Showing posts sorted by relevance for query reference material. Sort by date Show all posts

Thursday, August 9, 2007

Thursday Tips: Camping Reference Books

Every Thursday is tip day.

Updated 30 December 2009: Forest Service maps are now available online, so I've added the links into this post.

Reader Rick asked, “What do you use for reference material when you are planning your next stop?” I thought I would tackle this as my first Thursday Tips post. Warning! This is looooong.

As you may have figured out by now, we are Internet Junkies and Technology Nerds. We have mapping software, GPS, PDF files and websites galore. But we usually don’t decide where to stop for the night until about 3:00PM and while still driving. Until high speed, on the fly internet access is available even on dirt roads in Montana, there is no substitute for good old paper printed books. I have a whole shelf of them in the cockpit of Odyssey, and I use them every day to help us find the evening’s resting place.

I’ve included links below to buy your own copy of these books from RVBookstore.com, if they carry it. Their prices are pretty reasonable and the pages I’ve linked have a good description of each title. In addition, they carry a bunch of other RV titles, so you might try just browsing through them to see what grabs your attention. I’ve also seen many of these titles for sale in Camping World, at campgrounds, and on Amazon.com.

Most of these references live in the bookcase in the cockpit:


Maps and Atlases

My single most important reference for finding good places to spend the night is my trusty AAA state map. While we use our Garmin GPS for much of our routing, having the whole state in front of me is great for planning purposes. I can see at a glance whether our route takes us through National Forests, past state parks, near lakes or river, and the names of upcoming towns big and small. Knowing what kind of terrain lies ahead helps me pick which book(s) I’ll need.


Rand McNally Motor Carriers' Road Atlas, published by Rand McNally

Not a camping book, but an important road reference. Sometimes called just The Trucker’s Atlas, this book contains a listing, by state and route number, of all the truck routes that have low clearances. On the map pages, the truck routes are clearly marked. In most states, many of the state and county roads are truck routes, so it is easy to stay off the interstates and yet be on a road that can handle a long, heavy, tall vehicle. I know of no reference that lists low clearances on NON truck routes, so if we venture onto really obscure roads, I have to keep a sharp lookout for low bridges.

We use this atlas primarily to plan routes east of the Mississippi River, where roads tend to be older and bridges lower.

You can order this book here or buy it at most truck stops.


(State) Atlas and Gazetteer, published by DeLorme

Individual atlases available for most western states. These are very detailed maps, with 1 inch equalling 4 miles. They cover an entire state, but aren’t cheap (about $20 each), so we buy them one at a time as needed. They are also huge (11” x 15.5”) and difficult to store. They show public lands, campgrounds, boat ramps, historic sites, ski areas, and lots of other fun stuff. More importantly, they show the minor roads and how (or if) they are paved. Excellent resource for figuring out what land is, say, BLM and which road might take us to a good boondocking spot near a creek or at the top of a hill.

You can order the Alaska version here, although they don’t seem to carry any other states. We bought ours all over the place: truck stops, book stores, gift shops.

FMCA's North American Road Atlas & Travel Guide

Also known as the WalMart atlas, this book looks like a standard Rand McNally-type atlas with extra symbols showing towns with WalMarts, Sam’s Clubs, Flying Js, Cracker Barrels, and campgrounds. It does not indicate whether overnight parking is allowed at any given WalMart or Sam’s club. Available only to FMCA members.

We have also seen a similar atlas sold at WalMart, but without the Flying J and Cracker Barrel symbols. It’s been a while since we last saw one of those, though, so I don’t know if it is still available. If is, then it could obviously be purchased by anyone.

(Every six months or so, I print out a list of “No Overnight Parking WalMart Stores” from this website and keep that in a folder for reference while driving.)

If you are an FMCA member, you can order this book here.


Individual National Forest Maps. Before we hit the road, I ordered as many of the Forest Service maps as I could. I was so excited about the prospect of full-timing, and I needed a project to keep me busy and pass the time. At the time, each map had to be ordered individually from a different Forest Service ranger office,so it was extremely time-consuming. There are hundreds of maps. In hindsight, it would have made more sense to buy them as we passed through each forest, but I'm glad I have them. They provide the most detail of forest roads, campgrounds, topography (often), geological features, and more.

Forest Service maps can now be purchased online, through two websites. One is the National Forest Store, and the other is the USGS Store. I haven't used either of these sites to purchase maps, but at a glance it appears that the National Forest Store has better prices.

These maps are wonderfully detailed, but be forewarned: they take up lots of space. I have one file drawer dedicated solely to them:


Campground Guides


Guide to Free Campgrounds, West, by Don Wright

Also, Guide to Free Campgrounds, East. This is the definitive book on cheap camping. While the title implies all the camping is free, many of the listings are for sites that charge around $5 per night. Organized alphabetically by state, there is a locator map at the beginning of the state listing. A glance at the map shows if there are any sites near our route and the numbered markers make it easy to look up those sites. Lists many good boondocking spots on public lands such as BLM, State and National Forests, wildlife management areas, Corps of Engineers sites, public access fishing, etc. Lists most of the designated campgrounds on public land with brief descriptions and directions. Also included are inexpensive private campgrounds, county and municipal campgrounds, and a few other oddball types.

You can order this book here.


Coleman National Forest Campground and Recreation Directory , published by Watershed Communications

Ooh, one of my favorites. This book lists every single developed campground in the National Forests and National Grasslands. There are over 4000! Organized by state and then by forest name, the locator maps are unfortunately pretty cheesy and small. In the larger forests you might have to wade through a number of irrelevant listings to find what you want. But Forest Service campgrounds are so inexpensive and lovely that it is worth it. Each listing gives elevation, price, amenities, dates when open, number of sites, a brief description such as “Fir and pine forest setting” and maximum spur length.

This last one is a rough idea of how long the campsites are and can give you a sense of whether your rig will fit. We’ve learned, however, that 22 feet is the default length, so when we see a 22 we know that no one bothered to ever update the information. Therefore, the sites might be that short, but usually are much longer. Anything over 30 feet will fit Odyssey because (1) there is almost always room to hang the back bumper over the end of the camp space, (2) there is usually a built in fudge factor for an extra car and we don’t tow a car so more length for the rig, and (3) there is almost always a few spaces that are longer than the listing.

We’ve stayed in dozens of National Forest service campgrounds and have always found at least one space that fit 39-foot Odyssey.

You can order this book here; also available at Camping World, REI, WalMart and others.


RV Camping in State Parks, by D.J. Davin

I use this book to check if that intriguing green rectangle on my map has camping suitable for our rig. Lists whether the sites have any hookups and for some (not all) states, lists any length restrictions.
You can order this book here.


National Park Service Camping Guide, by William C. Herow

Like the State Park guide, but for National Parks. Because there are fewer National Parks, each listing contains much more detail about both the park and the individual campgrounds. For instance, the park description often includes entrance fees, hours of operation, and detailed directions.

You can order this book here.


RVer's Guide to Corps of Engineers Campgrounds, by Jane Kenny

Like the State Park guide, but for Corps of Engineers facilities. COE facilities are almost always associated with rivers and lakes and obviously feature water activities. We like COE campgrounds because they are usually less crowded and better maintained. Unfortunately, there are only a few in each state. Each listing in this book contains quite a bit of detail about the area and the individual campgrounds. For instance, the description often includes local attractions, size of lake/shoreline, fishing information and good directions.

You can order this book here.


Bureau of Reclamation: Lakes Guide, published by Roundabout Publications

Similar to the Corps of Engineers camping guide. Covers western states only. I’ve never seen an eastern edition.

You can order this book here.


Woodall's North American Campground Directory, published by Woodalls Publishing Corp.

While we rarely stay in private commercial campgrounds, when we need one, this is how I find it. Woodall’s listings are fairly comprehensive, although really small parks are often not listed. Since the missing parks are the ones with really short spaces (usually), low trees (often), or run-down conditions (sometimes), we don’t mind the absence.

You can order this book here, although Camping World often has them on sale.


AAA Tour Books and Camp Books, published by AAA

Like AAA maps, you have to be a member of AAA to get the Tour Books and Camp Books. That’s the bad news. The good news is that they are free to members. The Tour Books list and rate hotels and restaurants and usually has a good description of local attractions, especially in larger cities or popular tourist areas. The Camp Books are campground listings, which I use to cross-reference Woodall’s. I like the AAA books because they often list elevation, they include public campgrounds more often, and I trust the AAA ratings more than Woodall’s.

We keep our AAA membership primarily for the great maps, the Camp Books and the Tour Books. (AAA does not offer a towing service for RVs or motorcycles, but will bring fuel if you run out. And since the membership is linked to a person rather than a vehicle, if one of us is going out to dinner in a friend’s car, AAA’s roadside service would be available for that car in an emergency. Pretty good stuff for about $70 a year.)


Boondocking/Dry Camping Guides


Casino Camping: Guide to RV-Friendly Casinos, by Jane Kenny

A state by state listing of many of the casinos that allow overnight RV parking. While not every casino is listed (we’ve found some additional ones at www.casinocamper.com), this is a good reference. It lists details such as which parking lot is for RVs, whether there is an associated campground with hookups, how many restaurants are in the casino, and the size of the gaming facility. Since we don’t gamble, the last is only important to us in trying to determine the quality of the dining options (bigger casinos tend to have nicer restaurants.) We like casinos because they actively encourage Rvers to stay and often offer dining discounts or even a cash bonus.

You can order this book here.

Elkdom Travel Guides, published by the Carmichael Elks Lodge

State by state listings of Elks lodges that allow overnight RV parking. Available only to Elks members in good standing, this guide saved our bacon while traveling through Florida in high season. State, national and commercial parks were full and required reservations weeks in advance. Many of the tourist areas along the coast banned any sort of dry camping in WalMarts or other businesses. Having access to Elks lodges allowed us to continue to travel spontaneously. Plus, most lodges offer a free drink to visiting Elk, a welcome treat after fighting Florida traffic all day.


Day’s End Directory, by Guy Gipson

Available to Escapees members only. This great resource lists boondocking spots all over the country. They were submitted by members of the Escapees RV club and compiled by Mr. Gipson (formerly Bob Ed). Each entry lists the closest town, address or directions, a brief description (such as “Gravel parking lot” or “Quiet spot along river”), the name of the person who found it, and the latest date used. The date is useful for guessing whether the spot is still available. A site used 5 years ago near a fast-growing town may be a shopping center now.

Day’s End also lists “Good Guys,” local business where Escapees feel they were treated well. These include repair shops and chambers of commerce.

Update: Originally, Day's End was a printed publication. As of about 2009, the printing became too time consuming for the volunteers who compile the data, and it is now available only as a downloadable file from a special Yahoo group. You can print out sections as you need them, or refer to it strictly on your computer. I loved the old printed version, so I now take the file, convert it into a Word document, massage the font size and margins a bit, and have it printed and spiral bound at FedEX office. Last time I did this, it cost me about $15, well worth it for a good old-fashioned paper reference.

If you are a member of Escapees, you can order learn more about Day's End here.


Other references


Mountain Directory West, published by R&R Publishing

Also, Mountain Directory East. Like the Trucker’s Atlas, we use this book to give us some idea of what to expect from the road rather than to find a campsite. The Mountain Directories list high passes and steep grades on truck routes. Each listing gives details of how steep the grade is for how long; for instance, “The westbound descent is 8% for 1 mile, then 5% for another 3 miles, ending with a stop sign at the bottom of the hill.” Also listed are the elevation at the summit, any runaway truck ramps, separate truck lanes, and whether the grade is full of tight curves. If you’re a nervous driver, this book will either scare you to death or give you peace of mind as you avoid the really steep roads.

You can order this book here.


The Rver’s Friend, published by TR Information Publishers
This book lists all the truck stops in the US and Canada and is useful for finding diesel fuel. Each listing shows whether RVs are welcome to stay overnight, and if propane or a dump station are available on site. In the back are appendices listing state parks and rest areas with dump stations. While I rarely use it to choose an overnight stop, it is great to have on hand.

You can order this book here, or look for it at truck stops.


Road Trip USA: Cross-Country Adventures on America’s Two-Lane Highways, by Jamie Jensen

This book describes 11 routes, ranging from following the entire length of Route 66 to US 83: The Road to Nowhere. Along each trip, it gives funny, detailed descriptions of the towns and sights to see. While we have never followed a route from beginning to end, we overlap them often enough to pull this book out and read the listings. If an upcoming town sounds interesting enough, we just might decide to stop for the night. If nothing else, it is often good for a laugh.

You can order this book here.


Adventures on America's Public Lands, published by The Smithsonian Institute

This gorgeous book lists by state some of the most outstanding, yet little-known, areas administered by the Bureau of Land Management (BLM). A glance at the locator map shows whether we are near one of the sites, and the detailed listing tells us whether there is camping available. We’ve used this book to find hard-to-locate petroglyphs and to learn about lighthouses and wild horse herds. Access to such a wide variety of public lands is a cherished right of Americans and this book is an inspiration.

You can order this book here.


Eat Your Way Across the USA, by Jane and Michael Stern

A guide to good food in not-fancy places. We like to try the local food (our addiction to Olive Garden notwithstanding) and try to find the kind of Mom and Pop restaurants this book specializes in. We’re pretty good at finding them ourselves, but this book is fun to browse through and we’ve used it about a dozen times to find dinner.

You can order this book here.

There, now you have a list of our most commonly used reference books for camping. I hope someone finds this useful.

Friday, December 30, 2022

Closing out the year

We are underway across Lake Okeechobee, bound for the west coast of the state. The forecast says it will be in the 80s this afternoon and I will be back in shorts for the first time in quite a while. There's little wind today and the lake is as calm as I have ever seen it.

Monday evening we pulled off the ICW in Jensen Beach, south of the causeway, and worked our way in toward the south end of the city mooring field to drop the hook (map). That put us in the lee of the causeway and out of the relentless chop that had been behind us all day. We're too big for the moorings, making the city's whizzy new, but gated, dinghy dock unavailable, but we could get ashore at the boat ramp. It was raining and cold at dinner time so we did not even drop the tender, but we've made note of it for a future stop.

Last night's sunset over Lake Okeechobee from our aft deck.

That made for a short cruise Tuesday morning, and by noon we were dropping anchor in our usual spot off Arbeau Point, across from the Sunset mooring field (map). We had to squeeze in -- I have never seen so many boats in this anchorage, which on previous stops we've shared with only a few other boats. The moorings were also completely full, common at this time of year. Many unoccupied boats bespoke the holiday family visits that so many of our cruising brethren undertake, although this year I suspect many wished they had just stayed aboard.

When I had called the Lugger dealer under way in the morning, they told me UPS was scheduled to deliver my parts in the afternoon, and thus I took a chance and headed ashore with the e-bike for the five mile ride to arrive before closing time. I left enough time for stops at Staples for SodaStream cylinders and Chase for a bank errand en route. I arrived ashore to find more dinghies than I've ever seen at the free bulkhead in Shepard Park, reinforcing my observation about the anchorage.

After my other errands I arrived at Performance Power Systems a half hour before closing time, only to find the place nearly deserted, with the parts guy I had been dealing with gone for the day. The lone employee did find my parts in the delivery that had just arrived, but after fifteen minutes of struggling could not figure out how to get them into the parts inventory to bill me. I left my credit card number for the parts guy to sort out later.

Stuart goes all out for the holidays. I liked these festively lit palms.

The pair of thermostats cost me over two hundred bucks, but once I had them in hand I could see they were a pair of $15 automotive thermostats. One was still in a factory-sealed package from Honda. The other, a Balkamp item, was in a cardboard box and had been modified by Lugger, who over-drilled the hole to a larger size. The Lugger tech had told me about this when I originally talked to them, but of course they won't give you the size of the hole or the cross-reference part numbers.

I just expect to pay a markup of 100% for "marine" items that are really just re-branded auto parts, but 400% is really beyond the pale. Still, I had little choice. With no cross-reference ahead of time I'd have to tear the cooling system apart to try to identify them, and then there we'd be with the engine inoperative until we could source them. It's a racket. I have the numbers and hole size now, but will likely never need to replace these again. If either of them is even the root cause of the heater loop issue, which remains to be seen.

Still sealed $15 Honda thermostat and modified $15 Balkamp thermostat. $200 for the pair.

Even though it was already almost 5pm, I made a quick stop at Walmart on my return trip for a few items that are best sourced there, leaving the rest of the provisioning list for a later trip to Publix. I was back at Vector by 5:30, and after heaving the e-bike back aboard we turned right back around and headed for dinner. With a late start we went to the closest place, and old stand-by white tablecloth Italian place called Casa Bella. It's always been quite good, although on this visit I was disappointed with the veal, and I had stomach issues that had me down for the count all day Wednesday, so it may be off the list.

We'd hoped for just a single night in Stuart with a Wednesday departure after finishing the provisioning, but I felt so crummy we decided to just take an extra day. It was mid-afternoon before I felt good enough to go ashore and wrap up the grocery shopping at Publix, a decent walk from the dock. In the evening we walked to long-time favorite The Gafford for dinner, where we were able to dine comfortably outdoors. We both ended up with salads.

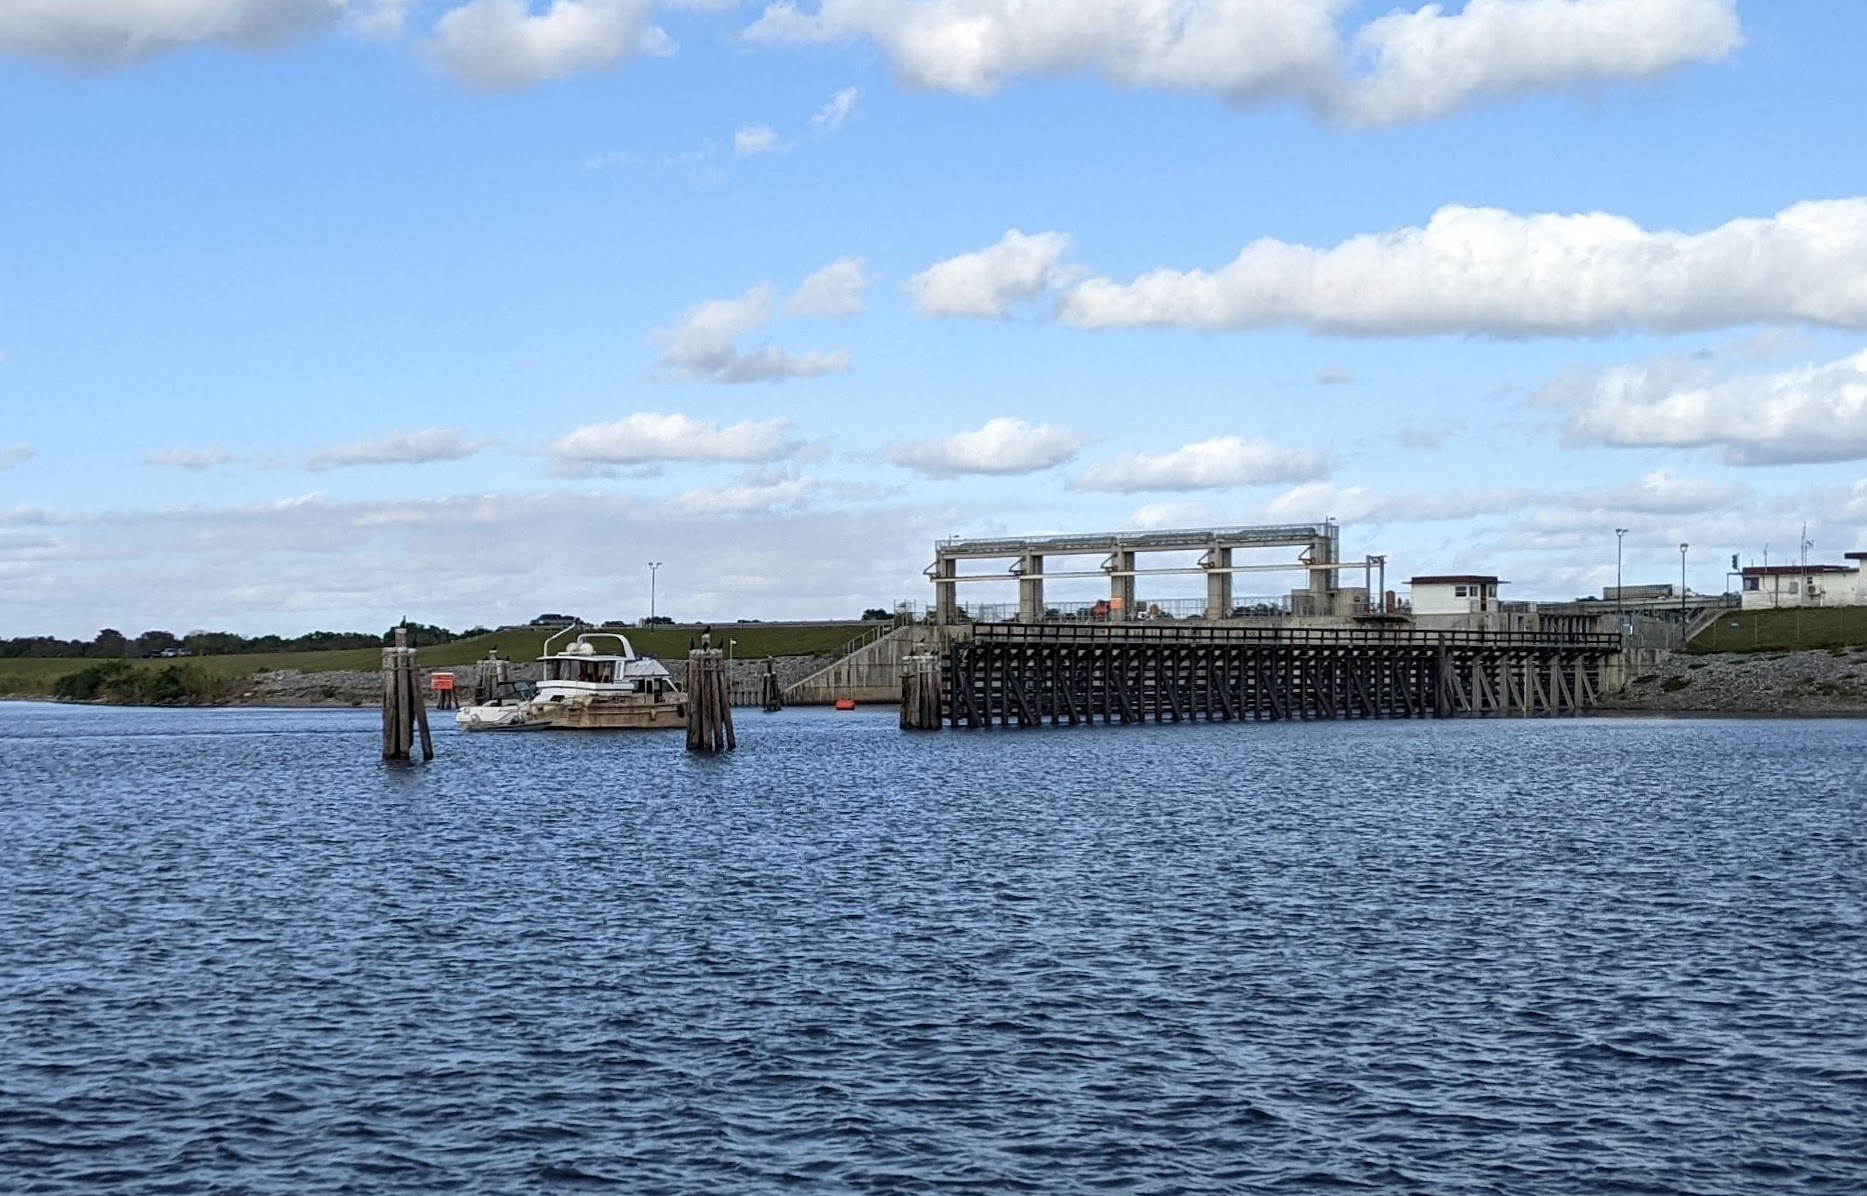
Yesterday morning things were back to normal, and we decked the tender first thing and got underway. I had to station-keep for a half hour at the St. Lucie lock, where the operators were their usual imperious selves. We've been through over a hundred different locks, most friendly and relaxed, but this one seems perpetually operated by, shall we say, jerks (because this is a family friendly blog). To be fair, they probably deal with a lot of inept boaters, but that's no excuse.

We passed this boat just before St. Lucie lock. No, it's not sinking; he's heeling it over with a giant water bag to get under a ~55' bridge. Port lights are submerged and the gunwale's awash.

We arrived at the Port Mayaca lock before 3pm. Typically we would tie to the dolphins on the canal side for the night, but with east winds, and very light at that, we decided to get the lockage out of the way and just anchor on the lake side. The lockmaster gave us a 45-minute wait estimate with a vessel under tow coming in from the lake, so we tied to the dolphins anyway to wait.

No sooner had I got the engine shut down than the lockmaster was calling us back to say the eastbounders were having issues and had tied to the dolphins on the lake side, so he would be turning the lock around immediately to get us and another westbounder through. We were on the dolphins just five minutes and I burned more fuel maneuvering than we saved by shutting down. We were in the lake a little after 3, and, with the lake high, we turned south past the dolphins to anchor (map).

Like most of the lake, the bottom here is a thin layer of loose material over solid rock. We got a set after a couple of skips and put extra chain out, which would be fine to hold us for the night. After getting settled we sat on the aft deck to watch the unfolding drama of the eastbounders, who were still tied to a dolphin. It was clearly a salvage, with a small motor yacht that had been submerged to mid-cabin and somehow raised being towed by a bow-rider ill equipped for the task. They had towed on the wire across the lake and were putting it on the hip to go through the lock, a fiddly process that would take a professional tow skipper about five minutes.

Salvaged boat being hip-towed into the lock. Note the canted scum line showing how far she sank.

After the show was over we went back inside to relax, but the anchor chain was scraping back and forth over the rocky bottom. On Vector that sound transmits through the chain and into the steel hull with amazing efficiency, where it then resonates throughout the boat. Not any sort of real problem, but we decided we did not want to listed to it all night, and so before sunset we weighed anchor and just tied to the dolphins (map), as we would have to do at lower lake levels anyway.

We had a sunset dinner on the aft deck for the first time in a long while. Another boat appeared from across the lake and anchored  across the channel from us, awaiting the morning's first lockage. By the time we finished dinner the lake was glass calm.

At this lake level we could take the rim route, which would take us past some different scenery here on our sixth or seventh crossing of this lake. It probably adds two hours and several miles to the trip, and some day I'd like to do it, even though we've spent time down there in the bus. But a couple of weeks ago the Corps of Engineers announced the route was impassable due to tussocks in the water, and while it may have reopened since then, we opted not to chance it. That gave me a good couple of hours in deep open water to type.

This facility has been an empty yard with a lift ways for years. Looks like it's finally accepting vessels.

Tonight we should be in Moore Haven, and we'll finish out 2022 under way toward Fort Myers tomorrow. We're hoping to anchor to visit downtown, where we have friends, but it's unclear if we'll be able to find a place to land the tender. All the marinas and most other docks were destroyed by Ian, and cleanup operations are ongoing.

We wish everyone a safe and happy New Year's, however you celebrate it. I'll talk to you again next year.

Thursday, May 23, 2013

We got the shaft


Out of the boat, that is.  It will not, however, be going back in -- it is corroded beyond repair.  That was our bad news for the day yesterday, after it took several of the guys a few hours to pull it out.  They had already given up on first removing the propeller, which is so badly frozen to the shaft that it won't budge.


The shaft is so badly damaged that the only reason I can see that it had not already snapped in two somewhere along the line is that, at 3" in diameter, it is massively oversized for this boat.  Several of the yard guys mentioned that the propeller nut is the largest they have ever seen, and they've seen a lot of boats.  Unfortunately, they also told me this is the worst shaft corrosion they've ever seen, too.

The shaft is stainless steel or some alloy very close to it.  While stainless normally does not rust or corrode the way mild steel does, it achieves this magic trick by maintaining a continuous layer of oxides on the outside surface.  Deprive it of oxygen and leave it in water, though, and it will be subject to a very insidious form of corrosion known as crevice corrosion.  That's what happened to our shaft, as the boat and shaft  sat motionless for months at a time.


These lines correspond to grooves in the cutless bearing.

At each end of the shaft tube is a "cutless bearing", which is a type of bearing that is supposed to be lubricated by flowing seawater.  The parts of the shaft that lay in these bearings had tell-tale lines of corrosion parallel to the lubricating channels in the bearings.  That was actually not the worst of it, and if that had been the only corrosion, it is possible that a small amount of material might have been trimmed from those surfaces on a giant lathe to make the shaft smooth again.


No, the worst of the corrosion was in between these bearings, where the shaft sat in unmoving and thus oxygen-deprived salt water whenever the boat was not running.  Large patches of rust cover most of this area, and in and among these patches are pits that look just as if a worm had started to eat through the shaft. Some of these pits are as deep as 3/8" -- turning this part of the shaft smooth on a lathe would take it from 3" all the way down to 2.25".  While that's probably plenty of shaft diameter for this boat, the rest of the gear, from the cutless bearings to the transmission coupling to the propeller itself are all set up for a 3" shaft.


My Leatherman awl in a pit.  Thread-eye on the awl is 3/8" from tip.


Tip of awl resting on surface, for reference.

The yard has not yet quoted me on a new shaft, but a quick search on the Internet for 3" x 11' Aquamet or similar shafts tells me we are looking at something north of $7k, not including lapping the prop or any of the other work required to install a new shaft.  We had not counted on this and it's not in our yard budget, so we are back to the spreadsheets to see if we can still get all the work done that we need.  The shaft and prop will be sent to a specialty shop in Norfolk, where the new shaft will be fitted and the prop will be cleaned up and balanced.  We will also spring for a "Propsmith" tool, which will allow us to have the prop removed more easily anywhere in the world, at the additional expense of drilling and tapping holes in the prop for the tool to pull against.

The crew has also removed all the lead from the forward compartment, which is also the anchor locker.  As we suspected, it was unsecured and not particularly well fitted into the space.  I was relieved to find out there was a sump below the lead, so water accumulating in that compartment was not sitting in contact with the lead the whole time (though the lead was pretty thoroughly coated with rust).  The bad news was that there was over 100 gallons of water in there when we finally got down to it.  Also, it's a good five cubic feet or so of empty space that could, instead, have lead in it, which would move the weight much lower in the boat, and also leave us more room up top for the anchor chain, which has several times piled so high as to jam the windlass.

Speaking of anchor chain, we were also disappointed to find out that we only have about 350', not the 400' we thought we had.  Not a real big deal, but it does make a small difference in where and when we can anchor.  Adding chain is not an option, and buying a whole new, longer chain is not in the cards right now.  The good news here is that we think we can fairly easily add a pad-eye near the waterline for an anchor snubber, which will knock six feet off the depth part of the scope calculation.  Using such a pad-eye will actually allow 350' of chain to do the same job that 392' of chain would do without it in normal conditions.

As long as I am talking anchors, in my last post I mentioned that John gave us the storm anchor and rode he had bought for the boat, a very generous gesture.  John had told me there was really no way he could store the anchor on the boat, and so I hauled it up on deck to see if we could get it fitted for some chocks to hold it to the bulwarks on the foredeck, about the only place we figured we could put it.  It would not fit vertically, but we could mount it horizontally if we found the right hardware.


One enormous anchor.

While I was hunting around for chocks on the Internet I discovered that this anchor is actually designed to break down for convenient storage.  In fact, the manufacturer sells a fancy canvas bag for it that comes with the two wrenches needed to assemble and disassemble it, as well as a spare "clip," the part most likely to get lost.  I found the directions on line and immediately broke it down, making it much easier to stow below decks.  $150 sounded like a lot of money for a bag and a pair of wrenches to us, so Louise ordered a bag online intended for skis (about ten bucks, with shipping) and I'll pick up some cheap wrenches someplace to throw in there with the anchor (I already have the two required 3/4" wrenches, but it's nice to have a pair right there with the anchor for quicker assembly).  The assembly directions call out some additional parts, called "mud palms," that we don't seem to have, but they are not strictly required.


Much more compact when broken down for storage.

We met a very nice couple on a 40' Lagoon catamaran in the anchorage here Tuesday, while they were ashore in their tender walking their dog.  They are from the San Francisco Bay area, so we had lots to talk about, and after giving them a little tour of Vector we were invited for evening cocktails aboard their boat Ryana.  When the appointed time came, I simply could not start the motor on our fancy new tender, and we ended up taking the old tender, with its reliable Honda but no lights, which had us heading home before the last light faded.  We really enjoyed spending some time with Diana and Ryan and their dog Stanley, who left the very next morning.

I'm not sure why I couldn't start the Mercury on the new dinghy, but it took me the better part of an hour to get it going the next day, as well -- something I was insistent on doing before anyone showed up to buy the old tender.  I ultimately had to haul the battery charger down to the dock after so much cranking, but eventually I managed to get it to turn over.  Figuring it just really needed to be run hard for a while, something we did not do after getting it going Sunday, I then immediately took it out onto the Piankatank River to get it up to speed.

And speed it does.  I never managed to get to WOT -- I quit at about 27 knots (31 mph), and that was in relatively calm conditions.  I'm sure with a steely operator it could do 40 flat out, but I was not going to attempt that in an 11' boat -- too squirrelly.  This little shakedown cruise convinced me even further that we need a much smaller motor on this boat.  Shortly after I returned, a nice couple came to look at the old tender, but ended up leaving with just the 15hp Honda motor.  I've got the tender and trailer re-listed sans motor, which is not generating nearly the same level of interest.

As for the 40hp Merc, it turns out one of the guys at the yard here has a 25 Merc and is looking for more horsepower.  We might be able to make a straight-across trade, with the bonus that he and one of his buddies in the yard would be available to do the swap.  I have my fingers crossed that it works out, as it will be the most convenient outcome.  I am told that his motor has been painted camo, though, which is more suited to duck hunting than a yacht tender. I am inclined to rattle-can it white to match Vector. Louise thinks the camo motor will simply become invisible, at least while we're anchored in the swamp.

Today we finally made it over to West Marine, which is, quite literally, the largest store in Deltaville.  We're still living on the boat, which has no air conditioning, and we wanted to try one of the 12v fans they sell there.  I also picked up a small grapnel-style anchor for the dinghy, and a new life ring to meet USCG regulations (our old life ring, which is perfectly serviceable, is only certified in Canada, not the US -- go figure).  Mostly, though, I wanted to see how complete their selection of electrical, plumbing, and deck hardware was, before I launch into the many projects on my list.  I'm trying to pre-order everything I need (West Marine, even when they have stuff, is not cheap), but there will inevitably be a missing Mark-I Framistat when I have something half way apart.

On our way back we stopped at the local hardware store, which is convenient (as opposed, say, to Home Depot, which is 30 miles from here) but did not seem to be particularly well-stocked.  Still, I am certain I will be in there any number of times for last-minute items.  The bulk of the items I will need for The Great Electrical Upgrade™ are already on their way here, and we got a half dozen boxes already yesterday.

Among the items that have arrived in the last few days are some of the new window blinds that Louise ordered.  We bought the exact same style we had on Odyssey, and they look and work great.  The boat had some very nice bamboo-type Roman shades when we got it, but Roman shades are a bad choice, particularly below decks, because they simply hang down too far in the fully open position.  On the below-decks port lights, they still covered more than half the glass area even when fully retracted.  By contrast, the double-cellular models we ordered collapse to just about an inch in height, allowing almost all the light in and also allowing us to keep the portlights open for ventilation.

Even upstairs, the new blinds are much lighter and brighter, and open up more of the window area when retracted.  Also, we now have a blind for the windows of the aft saloon doors, which was previously lacking and made for a bit of overexposure at the dock in the evening.  We are still waiting on the ones for the large side saloon windows, and I will try to post some photos when we have them all up.  I've got the ones for the pilothouse windshields, too, but I will need to come up with some kind of track for them before I hang them.

This weekend is a holiday, and the yard will be closed for three days.  I'll try to make some headway on projects, but I expect we will also be collapsing in a heap after a very busy week.  If we get lucky the weather may even get pleasant enough for a swim in the pool.

Tuesday, May 20, 2008

Dispersed Camping on Public Lands


A few days ago I wrote that we were parked for free on unmarked BLM land, away from any developed campgrounds or recreation sites. The very next day we were again parked for free in a National Forest. This prompted some of our readers to inquire if we could provide a sort of primer on "dispersed camping" on these public lands. And so, without further ado, herewith is my best attempt at collecting a variety of information on this topic, gathered from many sources, into one place:

What is Dispersed Camping?

Both the Bureau of Land Management (BLM) and the National Forest Service, the two largest stewards of publicly accessible federal lands, manage "developed" campgrounds on these lands. I put that word in quotes because it is the official term for any sort of preparation whatsoever -- sometimes a "developed campground" is little more than an official sign, and maybe a fire ring or two. In other developed sites, there might be extensive facilities to include restrooms, running water, picnic tables, ramadas, dump stations, and sometimes even power hookups. Most such facilities are considered "US Fee Areas" and require a nightly payment for use, often collected on site in a secure drop box colloquially known as an "iron ranger."

It is a perhaps little-known fact, however, that both the BLM and the Forest Service permit camping on virtually all land under their respective management, usually without fee. Both agencies call this "Dispersed Camping" in their official parlance. As with all federal programs, there are exceptions, and there are rules. Let's start with the rules, since knowing them will help explain the overall process and why some of the exceptions exist.

Rules

First off, let me say that both of these organizations are hierarchical, and the management of any given piece of land falls under not only the respective agency, but also potentially a regional office, a state office, a district office, and finally the office in charge of the given forest or BLM area. In some cases, rules are set by the local office in charge that differ from other units in the district, state, or region. I will try to give some general guidelines here that are in widespread use, but you should always check the specific rules for the forest or BLM area you intend to visit for any deviation, special rules, or restrictions that may be in force (more on this later).

Generally speaking, dispersed camping is permitted anywhere on BLM or Forest Service land unless otherwise posted, usually with the following rules:
  • In most locations, you must choose a site at least ¼ mile from the nearest paved road.
  • You must not choose a site closer than ¼ mile to any "developed facility" such as a campground. (There are some exceptions - BLM often permits overnight stays in picnic areas, for example, whereas the Forest Service does not.)
  • If you are going to an area where others have camped before, pick a site that's been used before. Plants, soil and wildlife are impacted by new campsites, so using existing ones will minimize your impact.
  • Camp on bare soil if possible, to avoid damaging or killing plants and grass.
  • Do not camp within 100 feet of any water source such as a lake, stream, river, or spring.
  • Do not camp in the middle of a clearing or meadow -- try to make your campsite less visible so that other visitors will see a "wild" setting.
  • Don't try to level or dig trenches in the ground at your campsite. For tents, pick a site that's already level with good drainage.
  • Campers, trailers, and other units must remain mobile (i.e. wheels must remain on all wheeled vehicles). Pickup campers may be set on jacks manufactured for that purpose.
  • Motorized vehicles must remain on existing roads, trails, and washes. Roads or trails commonly in public use cannot be blocked by parked vehicles or by any other means.
    • Park your vehicle safely off the road, but do not drive further than necessary from the road.
  • Quiet hours are from 10 p.m. to 6 a.m local time.
  • Operation of audio devices or motorized equipment, including generators, in a manner that makes unreasonable noise, as determined by the authorized ranger or officer, is prohibited.
    • The National Park Service noise limit standard of 60dBA at 50' is a good guideline to follow for daytime generator use.
  • Archaeological or historical properties including, but not limited to, petroglyphs, ruins, historic buildings, and artifacts that may occur on public lands cannot be disturbed.
  • "Pack it In -- Pack it Out": do not leave any trash behind.
  • Restore the site to its condition before you occupied it.
  • Dispersed camping in any given location is allowed for no more than a period of 14 days within any period of 28 consecutive days.
    • The 28-day period begins when a camper initially occupies a specific location on public lands.
    • The 14 day limit may be reached either through a number of separate visits or through 14 days of continuous overnight occupation during the 28 day period.
    • After the 14th day of occupation, the camper must move outside of a 25 mile radius of the previous location until the 29th day since the initial occupation.
  • Campers must not leave any personal property unattended for more than a specified period, usually from 72 hours to 10 days.

Most of our visitors here at Our Odyssey are probably interested in RV camping, but there are some additional rules when tent camping in the backcountry regarding dealing with human waste, spreading groups out over larger areas, and other "Leave no Trace" issues. You can read all about them here (among other places).

Note that sometimes the rules above are at odds with themselves. For example, the admonishment to stick to well-used sites when possible may conflict with the rule about being 100' from a water source, as such sites often can be found adjacent to streams or lakes. Use your best judgment in such circumstances -- we usually use the existing site, but are careful that our activities do not present any further contamination to the water source. The rule not to drive off the road conflicts with the rule not to park on or block the road -- again, use judgment: don't break new ground; instead, choose a spot where vehicles have been before, or where the impact will be minimal.

Campfires

One subject that deserves more than a bullet point is campfires. While many RV travelers do not indulge in this particular camping ritual, there is something about being in the rustic conditions common to dispersed camping that cries out for it. If you wish to have a campfire, be aware of the following:
  • Collection of "down and dead" wood is allowed on most Forest Service and BLM land for personal, immediate use (as opposed to stocking up for your wood stove at home, which requires a permit and a fee), unless otherwise posted.
  • Do not cut down any live trees or branches.
  • Gather wood over a wide area away from camp. Use dry drift wood on rivers and sea shores.
  • Many areas restrict open fires seasonally or when weather or other conditions dictate. Check the fire restrictions for the area you are in before deciding to build a fire. Camp stoves are generally allowed when open fires are prohibited, but there are times when even these are restricted. Appliances inside of RV's are generally exempt. Charcoal grills and even smoking cigarettes outdoors are not permitted when fire restrictions are in force.
  • Some districts require a campfire permit for fires outside of developed campgrounds. For example, all units in California and Nevada share a joint permit system -- permits are free and available from any ranger or forest fire station, good for one year.
  • If you choose a site that has been used before and already has an established "fire ring," use that for your fire to minimize the additional impact on the site.
  • If there is no obvious fire ring, make one yourself as follows:
    • Clear an area at least six feet in diameter of all combustible material such as brush, pine needles, cones, "duff", dead wood, etc.
    • In the center of the cleared area dig a pit about 12-18" diameter and 6-8" deep. Surround the pit with the soil removed from it.
    • If rocks are available in the area and wind dictates that you will need their protection, gather rocks from a variety of locations (try not to pick them all up from one spot) and arrange them around the pit. Use the loose soil to fix them in place.
    • Build your campfire in the center of the pit. Use only as much wood as will burn down completely by the time you are finished with the fire.
    • Make sure your fire is "dead out" before retiring.
  • If you built your own fire ring, you need to remove it before you leave the site:
    • Remove any large pieces of wood not fully burned, and pack them out with your trash. (Burn all remaining wood to white ash before putting your fire "dead out.")
    • Carefully return the rocks you used (if any) for the fire ring to the approximate places you originally found them.
    • Use the soil you originally removed from the pit to bury the remaining ash in the fire pit, smoothing the surface to match the surrounding environment.
    • Replace as much of the material you moved to clear the circle, such as pine needles, to restore the original appearance of the area.
You will note that you will need a shovel for some of these steps. It is generally required that you have a shovel on your site if you will have an open campfire. We use a small spade type that is only about 3' long, with a D-handle. This is perfect for campfire use (and we've also used it to dig Odyssey out of the sand), yet stores easily in the bus. Stay away from the folding "camper" or "army" style shovels or "entrenching tools" -- they're OK for backpackers, but you'll be more comfortable with a fixed model (trust me).

Exceptions

As with anything run by the government, it's not all that simple. There are some important exceptions you should be aware of:
  • Wilderness areas. Some parts of National Forest and BLM land are designated wilderness areas. While dispersed camping is generally allowed, travel by any sort of motorized vehicle is not. There are, therefore, no roads in wilderness areas. You'll need to go in on foot or horseback, and camp under the stars or in a tent.
  • Fee demonstration areas. There are several entire National Forests as well as some BLM lands that require a use fee for any recreational use at all, including dispersed camping. Generally, you can travel through these areas on the roads (paved or unpaved) for free, but stopping for any reason (e.g. hiking, camping, birdwatching) requires payment. These areas are often close to heavily populated areas -- examples include the Los Padres and Angeles National Forests near Los Angeles. Day passes can be purchased at a variety of locations, including ranger stations, or an annual "Adventure Pass" can be purchased for a specific forest or area. The good news here is that holders of the "Interagency Annual Pass" (what used to be the "National Parks Pass" with "Golden Eagle" endorsement, or "Golden Eagle pass") are already covered -- display your card, expiration date side out, on the dashboard, or the ranger station will give you a plastic holder to hang it from your mirror.
  • Seasonal closures. Many roads on federal lands are not cleared in the winter, or may have impassable washes in the spring. For that reason, roads are closed, usually with a locked iron gate, during these times. Check with the forest or BLM office for seasonal closure information.
  • Environmental closures. Some areas that are otherwise normally open to vehicle travel and dispersed camping may be restricted due to soil erosion, floodwater damage, nesting or habitat destruction of protected species, etc.. It always pays to check the web site or call the ranger or superintendent's office beforehand to find out if any areas are off-limits. Signs to this effect are sometimes posted on travel routes, but you can't always count on them.
  • Note that not all closed gates are locked or represent closures -- sometimes, they are just there to keep the cattle inside (many federal lands have grazing leases). Open the gate, drive through, and close it behind you.
  • The BLM operates several "Long Term Visitor Areas" (LTVAs) in the southwest. These areas require a fee and have a raft of rules of their own. There's a nice write-up on LTVA's and other BLM lands here, from www.rv-camping.org (note the official links to the BLM pages there -- follow those for specific regulations).

Resources

So, great, you say -- how do we find this stuff? I'm glad you asked. We use a wide variety of resources to ferret out good dispersed camping opportunities. Most of the references I will mention here were discussed in Louise's great compendium of travel reference books, and so I will not link them directly here.
  • There's a app for that... our good friends over at Technomadia produce the US Public Lands app for iPhone and Android; read about it here.
  • AAA maps, as well as DeLorme's Street Atlas and Topo software, show the rough major outlines of most National Forests. None of these is accurate or detailed enough for you to know whether any particular spot is inside the forest boundary or not, but at least they will tell you a forest is close by your route, and give you the name so you can look it up elsewhere.
  • BLM land is a bit tougher, as it is so ubiquitous that it is not shown on road maps. Most BLM land is in the west; this interactive map is a good starting point, but not detailed enough to be useful for specific sites.
  • The Forest Service publishes detailed maps for every area under their management. You can purchase a map for a specific forest for a few dollars from any ranger station in that forest, from the forest's headquarters, or from the superintendent's office. Or you can follow links on this page to order maps. We knew before we started our full-timing journey that we would spend lots of time in the forests, so Louise painstakingly ordered the visitor map for every forest in the continental states ahead of time -- hundreds of dollars worth that completely fill up a regular-sized file drawer. Now when we find ourselves crossing into Forest Service land, we just pull out the relevant map, and don't need to worry about trying to find an open ranger station to know where the roads are in the forest, or which ones are paved and which ones dirt, or where the seasonal gates are.
  • BLM lands (and sometimes state-owned public-use lands, where applicable) are often shown on the above-mentioned National Forest maps. These are usually only small patches of BLM land shown incidental to the primary purpose of showing the forest lands, but we've often made use of these areas.
  • Some DeLorme state Gazetteers, such as Arizona, show BLM land in detail, while other state Gazetteers, such as Texas, do not. This is kind of hit-and-miss, and I don't have a list for you of which do and which don't. Generally, when we enter a state and find a store selling the Gazetteer, we'll look to see if any BLM lands are shown. If not, we usually don't buy that Gazetteer, as this is the main purpose for which we use them.
  • The Forest Service has a web page for every forest (and "grassland," what the Forest Service calls lands it manages that contain grasses rather than trees), and you can reach any page through the "Find a Forest" link. While detailed maps are not generally available electronically, they often have other maps (such as seasonal route closures, restricted areas, etc.) on-line. This is also where you can find out about campgrounds and other developed recreation areas in the forest, as well as closures and restrictions I talked about in "Exceptions" above. Often the dispersed camping rules for a specific forest will be found somewhere in the links on the forest's page.
  • To access on-line BLM resources, go to their home page and click the state you are interested in on the map. In addition to other useful information, a state "district" map will load, and you can click on a district to get contact information for that field office.
  • Sometimes just Googling the name of the forest or recreation area you are interested in will turn up a wealth of information -- but be careful, some of it may be out of date or just plain wrong, so double-check anything you find on a non-official site.
  • Lastly, if you are a member of the Escapees (well worth it, I might add), their members-only "Days End" directory often lists good boondocking spots on BLM and Forest Service land that have been used by other Escapees in the past.
That concludes Our Odyssey's "dispersed camping primer." I've tried to be as complete and correct as possible, but please post a comment if I've made a mistake or omitted something important. I hope you've found some of this information useful; better still, I hope some readers will give dispersed camping on America's public lands a try.