
I know it's been a long time since I posted, nearly three weeks. Some folks are so accustomed to my nearly continuous blather here that we have gotten emails, comments, and calls asking if we are alright, and at least one couple wondered if we were still alive. Indeed, we are alive and well, if a bit exhausted and over-committed. With nearly three weeks to catch up on, this will be a long post, punctuated by numerous photos, so grab a beverage of your choice and settle in.
When last I posted here, we had just returned from a whirlwind trip to Charlotte, NC to attend the wedding of our cousin Nate. We really enjoyed the trip, and it was nice to have a break from the boatyard, but the three and a half days we spent away from here put us in perpetual catch-up mode once we got back. The yard is working at lightning speed, and it is all I can do to stay one step ahead of them. We are already over budget, and so I am taking on even more of the work to try to keep our costs in check.
To put all of this in perspective, here is just a partial list of things we are doing to the boat while we are here at the yard. Some of these are yard-only projects, some are Sean-only projects, and most are joint efforts:
- Clean, prep, and paint all bilges with epoxy paint.
- Add one ton of lead ballast forward of the engine.
- Install pad-eye on bow at waterline for anchor snubber.
- Install anchor washdown system on foredeck.
- Re-pack 2 tons of ballast in forward compartment and install overboard drains.
- Add automatic bilge pumps with direct overboard drains to the other four compartments.
- Remove rudder and propeller shaft for replacement.
- Replace stuffing box, shaft seals, and cutless bearings
- Align engine.
- True propeller and install PropSmith tool.
- Add line cutters to prop shaft
- Add crab-pot diverters ahead of stabilizer fins
- Restore emergency tiller capability.
- Inspect all water and fuel tanks.
- Replace black and gray waste systems.
- Touch up all exterior paint wherever corrosion has begun.
- Reinforce anchor roller and cut new hawse pipe in bow for access.
- Improve deck drainage on foredeck and flybridge.
- Add proper venting to lazarrette and anchor locker
- Drill limber holes where needed.
- Upgrade inverter, alternator, and battery system to 24 volts.
- Replace flybridge settee bolster cushions.
- Replace window blinds in saloon, galley, and master stateroom. Add blinds in pilothouse.
- Replace medicine cabinet and lighting in master head.
- Replace electric range with induction cooktop and compact dishwasher.
- Remove freezer from aft deck area.
- Diagnose and repair refrigerator cooling issue.
- Improve cat access to litter box area.
- Improve portlight closure system
- Add windshield washers.
- Replace dinghy and dinghy motor.
- Design and install proper seaworthy mounts for scooters on boat deck.
- Add 12-v fans to master stateroom and pilothouse.
That's not including the projects we had in mind when we arrived, such as relocating antennas to the mast, or installing the Webasto diesel boiler, but have since tabled for budgetary reasons. As you can see, it is an extensive list, and we're only about half way through it.
To be fair, some of these items fall into the "might as well" or "good timing" category. For example, even though our waste system has some limitations, we'd have been inclined to just live with them and/or work around them for quite some time. However, remediating the rust in the bilges underneath the waste tanks and painting in those areas meant the tanks had to come out. Now that they are out, just putting them back in as-is (if we even could -- two of the four tanks had to be cut to pieces to get them out) makes little sense. Now is the right time to replace the waste tanks and associated plumbing with something that will work better for us as well as allow better maintenance access to the bilges in the future.
With that said, here are some of the details. I'll start with the window blinds, since we were working on those when I last posted. I'm sorry I don't have good "before" photos of the blinds in the salon, galley, or master stateroom. But we opted to leave them in the guest stateroom, for the time being, since we don't spend much time there. Here's what one looks like, closed:

They look great. Unfortunately, here is that same blind, open as far as it goes:

You can see the problem this posed. Even in the fully open position, they don't admit enough light or ventilation. The ones in the master stateroom had the same issue, and here is what the new ones look like in the open position:

A big difference, indeed. These let some light through even when closed, yet offer compete privacy. When open they barely intrude on the window. The ones in the saloon disappear entirely when open, and here's one in the wet bar area, which clears the window when open, yet remains fully in the frame in any position:

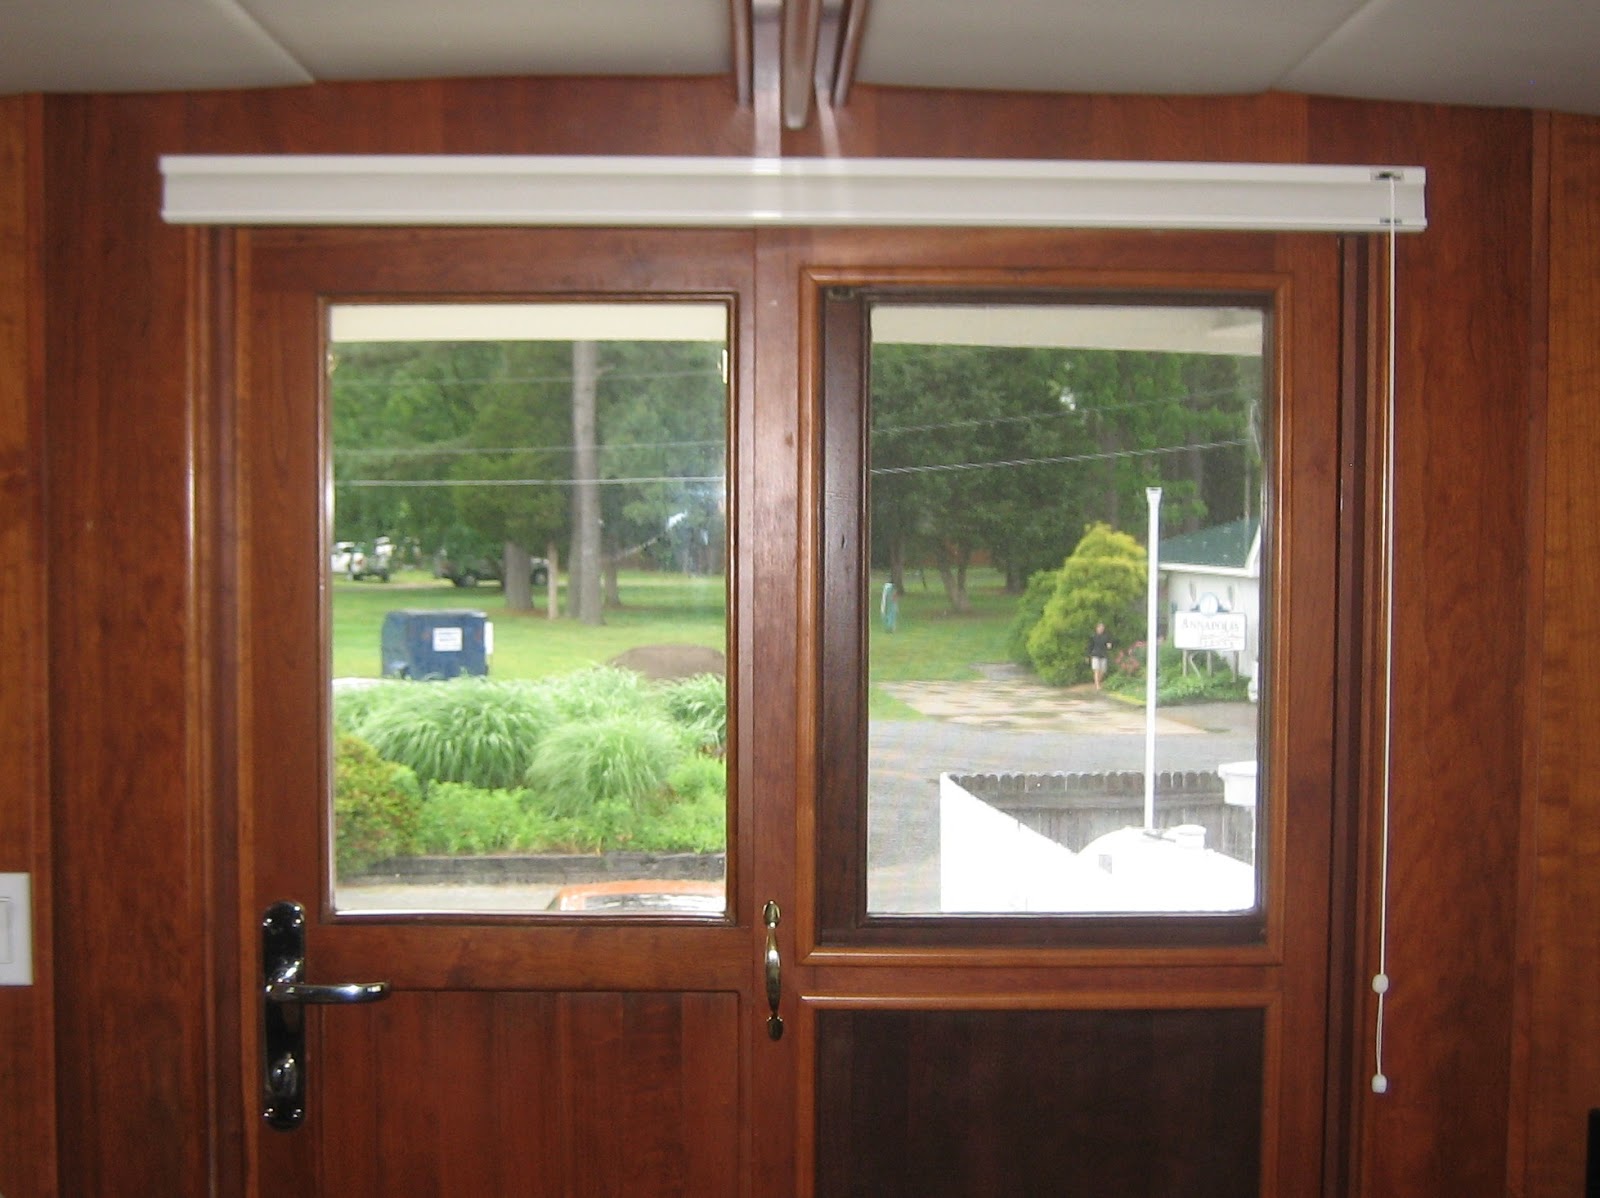
We also added a blind to the aft entry door, for privacy at the dock:

One of the many annoyances that was minor at first but got progressively more irritating as time wore on was the medicine cabinet above the master vanity. It was very nautical, styled as a "porthole" with the mirror in the center and a nice brass latch that, on the plus side, secured the door well when under way.

Unfortunately, the inside was just as round and small as the door, and the mirror was nearly unusably small. After three months of having to store nearly all our toiletries in little boxes in an adjacent cabinet, we decided to swap it out for something more conventional. That meant finding a model at least as wide as the outer frame of the faux porthole, but not as wide as the wall, and Louise came up with one that matched the existing decor nicely.

Yes, it's round inside, too. That's the only spot my shave gel fit.
Of course, the old one did not come quietly. It was one of the most robustly built items on the whole boat, and then it had been glued in to its round receptacle with permanent polyurethane adhesive, and it was all I could do to get it out of the wall without completely destroying the surrounding veneer. As it is, there is a bit of damage just outside the footprint of the replacement, but it is not visible from any normal angle. Once I had it out I screwed the porthole fascia back to the innards and put the whole thing in the free exchange pile in the marina's laundry room; it was gone within a day. I am glad someone will make use of it.
Cutting the rectangular hole for the new cabinet was equally challenging, and I made good use of a brand new tool. That would be the Master Mechanic oscillating multitool from the True Value hardware store in town. This model would not have been my first choice -- I would have picked a Fein or maybe a Porter Cable, but it was an emergency purchase for a different project, and it's all they had at the local joint.

New cabinet and light. It's hard to photograph mirrors.
Masking off and cutting the hole and then relocating the inside framing that was supporting the old one to the right location for the new one took the better part of a day. Once I had the wall open, though, I was also able to run power wiring behind it for a nice new light over the new cabinet as well. It was a bear of a project, but it came out nice in the end and will be much more useful than what we had. Louise has already filled it with little bins to keep our toiletries from moving around under way and then jumping out when we open the door.
Meanwhile, the yard has kept busy on a number of fronts. The anchor locker and lazarette had been painted, as I wrote last time, by the time we returned from Charlotte. Incidentally, this is what the empty anchor locker looked like before cleaning, prep, and paint:

The engine room was next, and to do that, all the floor plates had to come out. Some went all the way off the boat, but the rest got stacked on the guest berth for the duration. Cleaning, prepping, and masking took several days, and after two days of painting, we now have pristine white bilges in the ER. Somehow we did not end up with a photo of them before the floor went back in, which was a priority so we could get the floor plates out of the forward stateroom for other work there.
This past week, the guys have been putting a ton of lead ballast in the forwardmost bilge in the engine room, as recommended by the engineers who designed the boat. In case you wonder what a ton of lead looks like, here they are literally dragging it by its pallet, with a tractor, off the back of the delivery truck:

To fit the lead tightly into the bilge, many of the 50-pound blocks had to be sawed in half:

While all the engine room work was going on, the black tanks were removed from the center bilge, right at the bottom of the stairs. We still have a gaping hole there -- watch that last step. These tanks came out whole -- we knew that was possible, since they had been replaced a few years ago. The photo at the very top of this post is one of the two tanks, now sitting on its end, and looking very much like a surprised android with a monocle. The monocle is the tank level sender.

Black tank bilge cleaned and ready for sanding and masking.
Once we had them out, we learned the underlying reason for how often we need to pump out. The two black tanks are just 35 gallons apiece, stock items from Todd. With the tops of the pumpout fittings standing nearly two inches above the tank bottoms, that makes the usable black capacity just 60 gallons. At over a gallon and a half per flush, that's not a lot of flushes. (We also learned, as we pumped the tanks out for the very last time, that the heads are out of adjustment, with one of them using nearly twice that amount.) It is a far cry from the ~200 gallons that we thought we had, based on the boat's original specifications.
The gray tanks were another challenge. Once we had the black ones out, we could see that the two bilges were connected, with some bilge water leaching from the slightly higher gray bilge into the black one. We'd need to treat and prep both together before painting. Unfortunately, even after pulling up all the carpet and unscrewing every possible panel in the guest head and shower, we could find no access to the gray tanks save for an 8" access plate over the level sender. At least I could see through this access that we were dealing with more HDPE plastic tanks, and their general placement in the bilge.
With no other way into that bilge, we decided to saw out the floor in the entryway to the guest stateroom. The agreement was that I would handle that part, and the yard would remove the tanks themselves. It was this project that necessitated the trip to the local hardware store for the oscillating saw. Neither my circular saw nor my jigsaw could get close enough to the edges, and my reciprocating saw was useless with the top of the tank just millimeters under the subfloor. I took the floor out in three sections, to make sure I would not cut through any wires or the like, and because we could not tell if the 2x4's underneath were holding up anything else but this section of floor.

It took hours, and made lots of noise and fine dust -- I wore eye, ear, and respiratory protection the whole time. Eventually I had the section of floor out, including the 2x4's, to reveal another pair of Todd 35-gallon plastic tanks (also not the ~200 gallons we thought we had). Unfortunately, we could only see the middle of the tanks, with no access to the bolts at either end securing the hold-down straps. Not that access to the bolts would help -- unlike the black tanks, there was no way to tip these out intact. In fact, I could see no way they could have been installed other than before the guest head and shower were completed.

Inside the gray tank bilge after removal. Yuck.
The yard cut them out with a Sawzall. The result confirmed my suspicion that they were mounted before the room was finished. Beneath them was a filthy bilge filled with rust, dirt, and construction debris from the original build, including bits of sawed-off flooring material, screws, nails, and whatnot. Once upon a time the black tanks had ruptured (long before our ownership), and so this bilge was also full of sewage at one point. The bilge under the black tanks got cleaned before the tanks were replaced, but there was no way to do that in here. Cleaning all that out and prepping the bilge for painting, however, was included in the fixed-price quote we already had for the entire boat. (Removing the tanks was an extra charge.)
Those two bilges have now been painted, and what a difference that makes. Now we can actually get down in there and assess all the pipes, hoses, and wires running under the floors and make sense of everything. It turns out that there are hydraulic steering lines and other items down there that should really be accessible for maintenance should the need arise, and so we had to carefully craft a plan for new waste systems that would preserve some level of access to these spaces that does not involve oscillating and reciprocating saws and getting wastewater all over the place.

The gray bilge after painting, from a different angle.
The other item that will soon be at the bottom of the lower of these two bilges is a new 2000-gph automatic bilge pump, which will also need to be accessible for maintenance. Previously, the only way to pump this area out was to manually activate the complex high-volume pumping system in the engine room, then open the specific valve for the center bilge. This system is incredibly fast and high volume, but does little good if you don't even know there is water in the bilge, and no good at all if flooding starts while you are away from the boat. Since this is the largest, lowest, and most central bilge on the boat, it really needs automatic pumping and an alarm.
Keith, who owns the yard, and we spent a good deal of time discussing the situation and scratching our heads about how best to achieve this without breaking the budget. Built-in-place fiberglass tanks would be the best solution, but very spendy, and even cutting out the existing steel framing for the old tanks to put different, larger plastic tanks lower in the bilge on new framing was more than we wanted to spend. In the end, we decided to eliminate the gray tank altogether, in favor of this 4-gallon sump system, and then put one black tank into each bilge on the existing racks, larger than the old 35-gallon Todds, but small enough that I can squeeze past them into the bilges for maintenance.
I am still talking to roto-molded HDPE tank manufacturers, but we should end up with about 40 gallons in the forward bilge and another 50 in the aft one, for 90 or so gallons of black capacity. Not as much as we'd like, but 28% more than we had before, which, coupled with properly adjusted heads, should suffice. A side benefit of the new gray water sump is that it will be lower in the bilge and we can plumb both showers to it directly, eliminating the two shower sump pumps. In addition to the two showers and two sinks on the lower level, we'll also route all four air conditioner condensate drains into this sump. They currently simply dump into the bilges, which is a recipe for corrosion on a steel boat.
While I am talking about treating and painting all the bilges, there are sections of the hull which are not accessible that way, because they are the bottoms and sides of integral tanks. Those would be the two wing fuel tanks in the after part of the engine room, the belly fuel tank which is directly below the master stateroom, and the fresh water tanks, which are below the guest stateroom. The yard had quoted us for inspecting all integral tanks (any needed repairs would be extra), with the proviso that they would not have to remove any finish joinery (carpentry). The wing tanks are easily accessed through giant manholes in the engine room, but the other tanks are under the berths.
The water tanks were clearly sealed off before the guest berth was built. There are two large manholes, with corresponding cutouts in the wood subfloor above, but the two aft corners of the guest berth sit squarely on those cutouts, blocking access. Louise and I spent most of last weekend taking the berth apart.
We had to take all the drawers out from the inside -- they could not just pull out the end because they hit the wall. That necessitated removing and replacing an air conditioner that had been put there well after the fact as part of a shower expansion project; no doubt the technician who did that simply saw a big empty space that looked useful, without thinking about how that space was required to remove drawers. We were then able to easily remove the face frame at the foot of the berth, but that's where the easy part ended. The parts that were still blocking the hatches were the aftermost 18" of the side frames, which were single uninterrupted pieces of plywood.

Facing the prospect of taking apart the entire berth all the way to the forward bulkhead, air conditioner and all, we instead opted to saw through the side panels vertically from the inside, using the circular saw and oscillating saw. The outer finish was glued-on tongue-and-groove wainscoting, and by carefully spotting our cuts just at one of the joints, we were able to pull the pieces off without damage to the finish. When we put them back and mate the tongue-and-groove back up, no one will be the wiser.
This work needed to happen without blocking access to the forward end of the room, where the yard has been working on three other projects. One of those is the great anchor locker revamp, which required me to remove the windlass wiring, which formerly ran from under the berth into the anchor locker near the bottom, via a watertight fitting, then up inside the anchor locker to the windlass. That meant that the wiring was mostly inaccessible behind nearly three tons of lead ballast, and also that it was wet a lot of the time.

About two thirds of the three tons of lead ballast from the forward compartment.
Once the guys hauled all the lead out of the locker (yes, by hand) and onto the foredeck, I cut all the old wiring out, and the yard plugged up the holes. I cut a hole through the interior paneling in the stateroom above the head of the berth, behind where a framed piece of art hangs, to run the wires into the forward compartment at a much higher level through a hole the yard will cut through the steel bulkhead. When the ballast is all back in place, I will fish the wires up through the stateroom wall, where they will stay dry and can easily be replaced if needed later.

I cut a separate hole at the same level for the second project, the anchor washdown pump. The pump will be installed under the berth, and the yard is installing a through-hull and seacock in the bilge behind the bow thruster to supply the pump with seawater. I will run 3/4" PEX from the pump, through the collision bulkhead, and under the foredeck in the forward locker, where the yard will install a stainless hose bib through the deck. The pump will be powered up any time the windlass is powered up, giving us immediate washdown capability to rinse the mud off the chain as it comes up. Previously it took both of us to get the enormous bilge pump system configured and working to supply seawater to the deck for washdown, and even then, the hose bib was halfway to the stern, rather than right on the foredeck. The new pump should also deliver more water pressure where it is needed.
Once all the other work is done in the thruster bilge, it will be cleaned, prepped, and painted, and then a bilge pump will be added here, plumbed to an overboard discharge behind the cabinets in the guest head. The yard and I keep dancing around one another, since I am doing all the wiring for the windlass, washdown, and bilge pump, and the plumbing and installation for the washdown system, while they are doing all the drilling, prepping, and painting, and anything that goes through the hull or bulkheads.
Speaking of holes in the boat, when last I posted I showed you the beginnings of the bow eye project. To be honest, when we asked for a pad-eye near the waterline for a snubber, my mental picture was of a large stainless pad-eye bolted through the hull, as we have seen on so many boats, such as the one on this Nordhavn. Given Vector's size, weight, windage, and ground tackle, that was perhaps a bit naive. This is what actually got built:

That's 1" thick steel with a 7/8" hole. A 3/4 shackle is test-fit in this photo and I have purchased a nice Crosby 3/4" alloy shackle with a 14,000-lb rating for our snubber. The padeye slid into this hole in the bow:

Where it was welded in place. The underside of the body is welded along its full length to a ring frame inside the hull. I'm pretty sure we could lift the boat out of the water with this pad-eye. The concern, of course, was side-loading; you may recall we already bent our bow roller assembly from serious side-loading during two grounding incidents. The Crosby shackle is rated for 50% of full rated load at 90°, and the pad-eye itself should easily handle the 7,000 pounds.

As long as I mentioned the mangled bow roller, the yard straightened it and then welded stainless gussets to it to keep this from happening again. They look very serious.

Once the corrosion has been remediated and painted under where the roller mounts, we can get it back up there and see how it looks installed.

Surprises lurk around every corner. The painters have started their prep on the exterior paint touchup, which involves removing some of the deck hardware, such as the hawse pipes, to get at corrosion that has started underneath. They've decided to re-bed all the fasteners, and discovered that a handful have been glued on. This bolt head had been cut cleanly through, by a saw or die grinder, probably to remove the railing during some previous paint work.

Instead of drilling out the remaining part of the fastener to replace it with a fresh one, they simply glued the head back in place with urethane adhesive to make it look complete. Now we have to remove the railing to do the job correctly. They've found at least four of these so far, and we're not all the way around the boat yet.
Whenever I am not scrambling to keep up with the yard on the projects where my own efforts dovetail with theirs, I go back to our own household projects, one of which was to replace the stove with an induction cooktop. We don't use an oven, so we decided to repurpose that space for a dishwasher. Step one was to remove the stove, which I sold on eBay as "local pickup only." The buyer ended up using uShip, which you might recognize from the "reality" TV series "Shipping Wars." I will only say that the very aptly named Murphy's Transport arrived to pick up the stove, with another customer's travel trailer in tow. They were six hours late to us, and even later at the other end, but I understand the stove arrived safely.

The stove was only 19" wide, and the dishwasher, which is really made for countertop use, is a bit over 21". I had to use my new magic vibrating saw to cut into the adjacent cabinet to fit it. Making very careful cuts through the hardwood face frame, rougher cuts through the plywood, bracing the result, adding a shelf, and fitting the dishwasher into place through a dozen or so trial-and-error test fits took two full days, and it took me another day to rewire the power, install the 110-220 step-up transformer for the German induction cooktop, and convert the proprietary dedicated sink-faucet adapter setup for the dishwasher to hard-plumbed water supply and drain. The result looks pretty good, apart from the rough piece of scrap plywood standing in for the countertop -- we'll try to get something a bit more tidy while we await the opportunity to replace the whole counter with granite.

The countertop dishwasher was chosen because it mostly fit the space we had, without tearing up the cabinetry too much or having to make additional face pieces. Conventional household dishwashers, even the 18" compact units, are too tall to leave room for the cooktop, and the Fisher-Paykel dish drawers so popular in boats are too wide to fit without making new face frames and doors. Also, they cost five times what the countertop units do. We had to go with the 220-volt European induction unit because there are no 120-volt, two-burner units on the market, and we did not have room for two single-burner units either side-by-side or front-to-back.

It looks a lot bigger on the countertop, as designed.
Whew. Are you tired yet? There's more.
Somewhere in all of this I cut a nice round hole under the flybridge ladder for the cats to access their litter box. This will allow us to put the door back on the cabinet where it is located, so it will all be out of sight except when I need to clean it. I made this hole, BTW, with a large hole saw sold for making pot-light cutouts in ceilings. The saw cost me $30, but there is no neater way to make a clean hole. I'll likely be using it again to make access for them to get into the master stateroom even when the door is closed, so we can have privacy with guests aboard but still allow the cats in and out.

While I was back in the litter box cabinet, which is also the access to the back of the fridge, I did some diagnosis on why our food is not staying as cold as we'd like. I did find an insulation problem on the evaporator line, and fixing that helped a bit. But it looks as if I will also need to add some refrigerant; fortunately I found a service port and I have a gauge manifold.

This putty has separated from the fridge, exposing the evaporator line.
Lots of other little projects too numerous to list have also been under way. We work seven days a week, and the yard works six. I did take a half day today to try to catch the blog up, but we spent the morning taking apart the master berth, under which is the access to the main fuel tank. I also removed the carpets, including all the tack strip and hundreds of staples that secured the carpet pad.

Chaos reigns all over the boat. This casual shot of the pilothouse settee is typical, with tools, project materials, and stuff we've had to move out of the way everywhere:

Nothing is where it should be, and with all the tanks out we can't even wash our hands on the boat. The afternoons are hot and sweaty with no air conditioning, and I have enough contusions, lacerations, and aching muscles to have spawned a new saying in our lives: "the boat always wins."
Even though we still have not caught up from our last wedding excursion, we are once again leaving the yard for several days next weekend to attend our niece's wedding in Colorado. I will spend most of this week teeing up everything for the yard to keep working in our absence, including cutting several holes in the master stateroom floor to access the bilges on either side of the fuel tank. Maybe I can catch up on my sleep on the plane ...
Im tired just from reading this, but I'm glad you're ok, other than over-working.
ReplyDeleteI agree with Sally S, I am going back to bed now.
ReplyDeleteWhew !!!
Thanks for the update.
Bill Kelleher
Thanks for taking time to note all the progress that has been done on the boat. Enjoy the trip to Colorado. Great post.
ReplyDeleteNice report Sean do you keep a running notebook daily on what you will put into your posting. And having been on the hard for almost 3 1/2 summer months one year on the C&D Canal I ran a water line to my forward breath a/c to run the air so as to at least get a good night sleep. Also aren't ur A/C discharge thru hull just above the water line. Enjoy reading your blog but I believe we where up reading Chris&Cherie's report on they 8-71.
ReplyDeleteNo, I do not keep a notebook. When we are cruising, of course, we update the ship"s log at every evolution, so I can go back to that. Here in the yard, I use the photos we've been taking along the way as ticklers for what needs to be written up.
DeleteThere are ways to make the A/C work on the hard, and some yards have portable cooling towers available to hook up to the raw water inlet and outlet ports. Since we are not sleeping on the boat, it's not really a big problem for us. The A/C works fine in the bus...
Head spinning. Yikes.
ReplyDeleteYou have been hard at it since we heard from you last. Thanks for the update, I am following your adventures with great interest and appreciate the update. Enjoy your Colorado trip and I'll look forward to your next report.
ReplyDeleteA complete retrofit of almost everything...... But it will be much more handy to operate things when you are finished.. You didn't mention the main shaft and its packing, perhaps because the yard did most of that task... Don't give up, as it will be really nice in the end.. and as JB said we really enjoy your technical posts Thanks for taking the time...
ReplyDeleteI did mention that we were replacing the shaft, in the seventh bullet. There was no packing previously -- we had a "dripless" seal. I had to put that in quotes because it was, in fact, spraying seawater all over the place. As I mentioned later in the list, we are replacing that with a traditional stuffing box, although we will be injecting it as well. There will, of course, be packing in the stuffing box.
DeleteWow.
ReplyDeletethe big question is,will you have any $$ left for fuel after you are done with these projects? looks like the bus was a lot cheaper to maintain..... you are going to have the best boat in the harbor once you are done! although i think larger black tanks might be nicer for long voyages..
ReplyDeleteYes, we have funds left for fuel. We had prepared ourselves, from when we finished the survey and made our adjusted offer, to spend 10-15% of the purchase price of the boat on these repairs. Some unforeseen issues such as replacing the propeller shaft and cutting the waste tanks out in pieces have driven that up and we are now a bit over 20%, but that's within our margin of error. It does mean that some other projects will have to be deferred for a while, as I mentioned.
DeleteYes, RVs are much less expensive to maintain and operate than boats. We knew that going in. But we could not drive the bus to the Caribbean, or Europe, or the South Pacific. Hard to know whether our fuel budget will increase or decrease -- so far, it has been much lower on the boat.
Long voyages don't require any black tanks at all -- it gets pumped to sea. The tanks are required for long stays at anchor or at the dock, minimizing the number of trips to the pumpout station (or out past the three-mile limit).
Overwhelming! I'm not sure how you're able to keep up with all this, much less pay for it. But you will have a very fine boat when it's done.
ReplyDeleteI'm not surprised by anything you found on this boat, but the sheer number of bad decisions during design and construction is fairly amazing.
Good work you guys, and here's hoping you get out of there soon with something left in your wallet.
Thanks, John. I know you don't envy us the yard work, but I might make you a tad envious in an upcoming post, wherein I detail that we are cutting the master berth down to queen-size, giving us more aisleway on either side.
DeleteWe did, quite sheepishly, have to go back to our financial planner and ask for more cash. But she only had to reduce our life expectancy by a very small amount ;-)
Yes, some bad decisions (and/or bad execution) were made during design and construction, but on the plus side, this is about the sturdiest boat we've ever seen, and we gain confidence each day that she'll handle nearly anything. Possibly to include Arctic ice -- the bow sections are stout.
Wow. It's like watching an episode of Mr. Blandings Dream Boat. Everything is looking great Sean.
ReplyDeleteGlad to see you come up for air to up date us. I figured you were too busy or perhaps had switched to a different blog with out telling us. I have really appreciated keeping up you you folks ever since you helped us in Greensboro, NC Chandlee
ReplyDeleteSean, wow, now I feel lucky. We're readying Antipodes for our November trip south from San Diego. Much less work than you've listing on our sister boat. Still, hydraulics, A/C, Steering, electronics and bilges are all being refreshed. Keep in touch, one day we'll get together.
ReplyDeleteWe should compare notes. My guess is that you might find some of the same hidden issues that we have here. We are still not clear on where Ocean Ventures left off and the next owner began.
DeleteI am assuming your November trip is the FUBAR. We tried to find crew positions on the FUBAR the last two runs, just to get some experience, but came up empty. Your Ensenada experience should stand you in good stead. You will need to keep us posted on the rally.
Sean, Agreed. We just had Bob Senter (Northern Lights) on the boat for the day. We reviewed the main and the gen set and all looks good outside of a few issues, some already on my list and a couple of new opportunities. Great experience having Lugger Bob on board.
DeleteYes to the FUBAR, we're leaving November 7th to La Paz, hope to make the East Coast in 2015 and back to San Diego in 2016 for our son to attend high school.
Sean, how about that coupler between the engine and transmission. I think that failed with the old owner up on Lake Michigan, and they didn't have the right size and had to use a smaller one than was really required. Just a thought. Steve
ReplyDeleteWhat you are remembering is the flexible coupling between the transmission and the shaft, and it was actually replaced with a larger one, not the other way around. The original one was too small. In any event, even that one has since been removed and replaced with a proper fixed coupling, which we are having refaced and balanced before reinstalling it. We looked into replacing it with a tapered coupling, but that will eat up more of the precious room between the coupling and the stuffing box, already a tight squeeze for a get-home system. The shaft shop felt this one was serviceable.
Delete