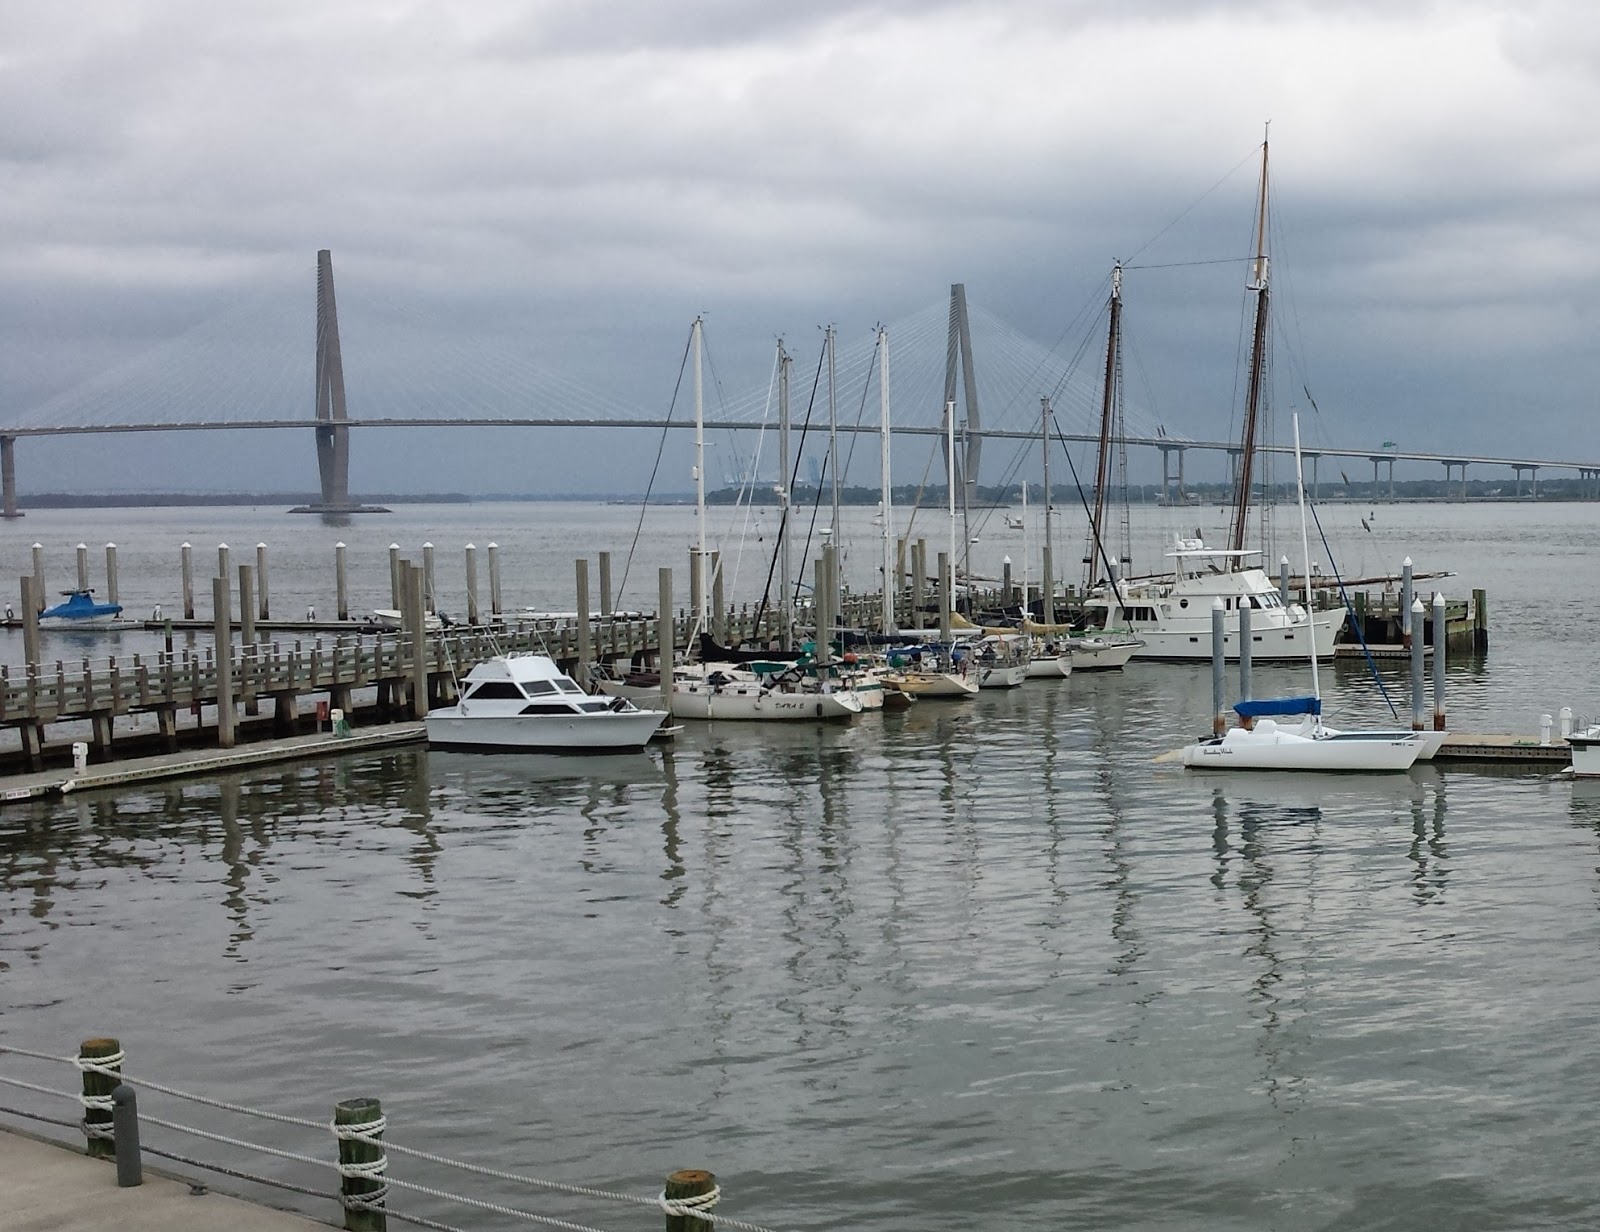
We are docked at the Charleston Maritime Center, on the eastern waterfront of downtown Charleston, sandwiched between two commercial wharves along with the aquarium and the visitor center for Fort Sumter (map). This is also the landing for the water taxi, which runs only on Saturday at this time of year, and two different tour boats, which I am sure are much busier in the summer season.
There is a nice, if pricey, 24-hour Harris Teeter grocery store a short walk away, and the free downtown shuttle stops just a block from here. Several restaurants, a drug store, and two hardware stores are also within walking distance. That said, we backed into the slip to tie to our port side, taking advantage of our planned slack-tide arrival, so that we could offload the scooters, which we did the afternoon of our arrival. Louise shot some video of the scooter offloading process, something we've been meaning to do for a while now.
This is really a great location, as we are just a few blocks from the Charleston City Market, which in turn is the center of the downtown restaurant and entertainment district. It's a short scooter ride and we've enjoyed dinner out each evening since our arrival. Parking is clearly a challenge in this town, but we can usually find a place to squeak a scooter in here and there as needed.
We had something of a fire drill getting here on Saturday. Knowing we wanted to arrive just ahead of slack, which was at noon, we started weighing anchor at 11:15, figuring about a half hour at slow cruise to get to the marina. But when the snubber and chain hook came up out of the water, the chain hook was fouled in a rather interesting way. This is the second time this has happened, the first being when we went to lengthen our rode in Wrightsville Beach for an approaching storm. As our tender was already in the water, I motored around to the front of Vector and got it untangled.

This time we had to do it from on deck, which was more of a challenge. Fortunately, once we got a second chain hook on the chain below the fouled one, and let the weight off the chain, a couple of shoves with the boat pole got it to drop free. This is our fancy new Mantus chain hook that is designed to be less prone to slipping off entirely (although it's done that once, too), and, clearly, the extra slot can be a liability when it comes into contact with the dangling slack in the chain. Henceforth we will try to get the slack to dangle on the other side of the snubber, although it has a will of its own when the snubber itself goes straight down.
After fiddling with the pesky chain hook for nearly 15 minutes we were finally able to weigh anchor and get under way. I'm glad I left the extra time, as we still made it to the marina ahead of slack, as planned.
Saturday evening was the local holiday boat parade, and we spent the first half of the evening on deck with a glass of wine watching them all go by. We again had front-row seats, and I'd like to thank long-time reader Jay in New Bern for calling our attention to it -- we'd likely otherwise have been at dinner when it happened. That said, I have to admit that the one in Wrightsville Beach was really much more impressive. Save one, the boats here did not play any music on deck, and at least a couple of the boats seemed to be decorated only halfheartedly. We didn't even bother to take pictures.
Sunday morning we started in on the flooring project. Step one was to get all the furniture off the saloon floor, including the bolted-down dining table and the steps to the galley. Most of it fit nicely stacked on the settee, with one of the enormous swivel chairs being crammed into the pilothouse for the duration. We pulled the whole carpet (minus the stained section I had already cut out a week ago) up in one piece, rolled it up, and stuffed it in the huge commercial dumpster here at the marina.

Furniture stacked on the settee. Carpet is already up and you can see the pad and tack strip if you look closely (click for full size).
Fortunately, the subfloor was in pretty good shape. There are a few stains, with matching ones on the underside of the carpet, from a decade of spilled drinks and what-have-you, and one small section with some water damage near the aft door. The tack strip in that area was rusty, but generally clean elsewhere, a good sign.

Chaos reigns in the pilothouse for the duration.
Speaking of tack strip, getting all the tack strip up as well as the staples that held down the carpet pad took the next hour, and then it was time to level the subfloor. I say "level" because that's what I've always called the process, but the reality is that nothing is level on a boat, and the tool of that name can't be used for anything practical. Moreover, aside from it being tilted whichever way the boat happens to be leaning, the saloon floor is slightly convex, as is the entire deck, so it is higher in the center and lower towards each side wall. What I really mean is "smooth" the subfloor.
Here again we got lucky. Carpet over heavy pad is very forgiving of imperfections in the underlayment, and when I did this job aboard Odyssey a few years ago, I had a major project cleaning up spilled adhesive, sanding down high spots, and filling in divots, all of which had arisen during the construction process but were hidden under heavy carpet pad. By contrast, here we had mostly smooth plywood, and I used the sanding attachment on the oscillating tool only to smooth over the nail and screw holes from the tack strip and table baseplate, and knock down the higher edge of adjoining plywood sheets.

Skim coating the rough spots. (Don't be fooled by his preppy attire; those are ancient, stained, ripped khakis from when he was 20 lbs. heavier. -Louise)
The seams between the sheets, as well as the dimples around the securing screws still needed to be "leveled," and there were also a few spots where the grain of the plywood was too rough to be left untreated, and I did end up applying a thin layer of skim coat to most of the floor. The oscillating tool made quick work (and a lot of dust) of the handful of ridges left by the skim coat itself. We had the prep all done by the end of the day Sunday, and we treated ourselves to a nice dinner over a glass of wine.
On Monday I started laying the new flooring. A few words are probably in order here about the product, which you will decidedly not find at Home Depot or any other retail store, for that matter. I will start by saying that we wanted a "yacht finish," which is difficult to define, but, to paraphrase Justice Potter Stewart, I know it when I see it. To that end, we evaluated quite a number of options.
First among these was the type of flooring already found in the uncarpeted areas of the boat, traditional "teak and holly" wood sole. As with almost all teak-and-holly soles of the last two decades or so, our teak and holly are actually veneers over plywood and one buys such flooring by the sheet, just as any other cabinet-grade plywood. Because of the shape and size of the floor, we'd need four 4x8 sheets at a cost of around $400 each, plus shipping.
Beyond the cost of this flooring, it is really beyond my capabilities to install it myself. Cutting huge sheets to fit around the complex curves and angles of our existing floor requires tools, space, and, frankly, a skill level that I do not have. As we were at the boatyard at the time, we asked them to quote on installation, which came out to just shy of $4,000. On top of that, they felt there would be no way to get it tight enough to existing joinery to avoid having to then also trim around the edges with molding, an extra expense.
There are also vinyl sheet flooring products that imitate real teak and holly soles, and Louise ordered samples. They were quite good -- we put one sample against our existing floor and it was dead on -- you could not tell them apart. As it turns out, the material itself is not much of a cost saving over the plywood, but I would have a fighting chance to install it myself. The yard wanted as must to install this product as the plywood, which ought to tell you something. The advantage would be fewer seams and less waste, but in the end its still just vinyl flooring, but an order of magnitude more expensive than what you could find at a flooring retailer.
As tempting as it was, I was not comfortable taking a knife to nearly $1,500 in flooring to try to do this myself. I just don't have enough practice. When I did this on Odyssey, even though that was arguably a more complex template, I was starting with $64 worth of sheet vinyl, so it was a very low-risk proposition if I screwed it up. We did not have it in the budget to spend $5,000-$6,000 to have the yard install new flooring, so we went back to the drawing boards to look at other options.
We ended up taking another page out of our Odyssey playbook. Long-time readers may recall that, well before I replaced the bedroom carpet with the aforementioned inexpensive sheet vinyl. we went through this same exercise in the salon and penthouse. At the time, we elected to try a new product in the RV and marine market made from woven vinyl strands with a neoprene backing, being marketed as high-end flooring for areas where, for example, granite tile is unsuitable, perhaps due to weight.
That product came on rolls and was extremely expensive. We were fortunate to get it at no cost, installation included, by agreeing to be the guinea pig coach for it as part of a new business launch -- I could not even tell readers the product name or installer at the time. That business was an unfortunate victim of the massive downturn in the RV industry in 2008, but we got the name of the material supplier from them -- Chilewich Mills, makers of "Plynyl."
That would have been the perfect answer, except Chilewich does not sell through retailers, only commercial designers, as do their two competitors in the woven-vinyl flooring industry, Bolon (used in Outer Reef yachts, among others) and 2tec2. Nevertheless, Louise was relentless in her pursuit and after several days of Internet research, found a company selling sheet goods remnants from these manufactures as floor mats, and also remaindered boxes of square tiles. We were able to find three 16-tile boxes of 50cm 2tec2 "Euro-Flor" tiles in a pattern we liked and snapped them up -- less than $400 total. We also bought two of the floor mats, a Chilewich product, that matched each other and were the right size to do the whole master stateroom if I piece them correctly (the squares were not suitable for this because we need to be able to lift it to access the bilge).

Piecing it together. Scraps of tile, tools, and carpet tape backing paper are everywhere.
I found the tiles surprisingly easy to work with and cut, requiring only a sharp utility knife. An arrow on the back of each tile shows how to orient it for a seamless appearance and there were detailed installation instructions on the manufacturer's web site. Using a variety of template tools and techniques, as well as a great deal of patience while cutting, I was able to get a very tight fit at all exposed edges, right up against the existing joinery, so no additional trim was needed.
The finished floor looks great, and you can't really tell it is composed of squares unless you know where to look. I had to pull a couple of squares up during the process and had trouble finding the edges. Rather than using adhesive, I elected to use double-sided carpet tape along all the seams. If we need to replace a damaged tile at some point, it will be relatively easy. I only needed 36 tiles to do the project, so I have 12 spares.

The end result. This area is mostly hidden under furniture, so my joint against the wall is less precise here.
I think if we had been able to get three fresh boxes direct from the factory, they would have been sequentially numbered from the same lot and there would be no detectable variation at all. As it stands, I had to go through all the tiles to try to get the best look (why I needed to peel a couple up) and, when the room was empty, you could detect a gradation from one side of the room to the other, revealing where that one longitudinal seam was. Now that the furniture is back in and we've walked around on it some, we can't see it any longer.

Louise rushed to put this ottoman back "to check the color." I'm not sure what I was to do if there had been a mismatch -- rip up the floor or buy new furniture?
Based on our experience with this style of floor in the bus, we know it is impervious to cats, and, as a bonus, we are now less worried about tracking stuff in from the aft deck. It feels fine underfoot, and we have not noticed an appreciable difference in noise level, although we have yet to be under way with it. It remains to be seen what the longevity will be, although the sheet goods on the bus are still going strong six years later. At a total investment of less than $450, plus two full days of my time, I am happy with the result.
I spent most of Tuesday relaxing in recovery mode -- that kind of work is hard on the knees and the back. Yesterday I still lacked motivation to start another physical project, and so spent a good part of the day making progress on getting fully moved over to my new laptop. The easy part is done and now I am down to the handful of things that were easy in Windows but I am still trying to work through in Linux -- possibly the subject of a blog post in itself.
In the meantime, we've walked this section of the River Walk and gone through the Park Service museum at the Fort Sumter ferry landing. Charleston is a walking city, and, honestly, the last few days have been too cold here to want to do much of that. But we've seen a good deal of downtown on the scooters as we've traveled to dinner, and we browsed through the City Market a bit. Tonight or tomorrow we will go a bit further downtown for dinner at the Harbour Club, a requisite stop for us when we are in town.
At this writing it is not looking promising for a departure on Sunday. Monday is also questionable. We're paid up here through Saturday, and we'll shove off at slack tide regardless, intending to wait for weather in an anchorage a bit closer to the inlet. Our next hop is a fairly long one, to Port Royal Sound, and we'll need to make a dawn departure to even make it to the first anchorage, at Skull Creek, in the daylight.
Sean - I always enjoy reading your updates. You are a good writer. Hilary and I have enjoyed following you along on your boating journey. Hopefully you have the boat in a condition to really enjoy it more now that all the refitting is done.
ReplyDeleteI was really intrigued to read about your flooring. I'm right in the middle of trying to come up with a floor approach for our bus. (Yes, should have done this a long time ago....) I really liked what you have in Odyssey. The squares makes it even more interesting. Could you share with me where Louise found the tile squares at?
Hi, Brian:
DeleteI found one vendor in eBay who is selling these woven vinyl products: http://www.ebay.com/usr/icarpetileskentucky
They also have a regular website, http://www.icarpetiles.com/default.aspx with a slightly different selection.
The specific product we bought was the "Chilewich Desert" tiles, although when you drill down into the details it is actually Euro-Flor, not Chilewich. It's a bit confusing, but if you search for "woven vinyl" and/or "Chilewich" you'll find the various brands, which are all quite good products.
I think this company is selling samples and closeouts, so their selection is odd and limited. They are very helpful and responsive to questions.
I also found another company with a much bigger selection of colors, but their prices were outrageous. Hundreds of dollars just for a 2' x 3' entrance mat. The stuff is nice, but it aint THAT nice!
Love the title. Damned carpetbagging Yankees! Oh, wait a minute, I am one. LOL. Nice work there! Very suitable for the application.
ReplyDeleteI tried to post a reply earlier, but it looks like it got lost in cyber space. ...
ReplyDeleteThanks for the reply Louise. I checked out the iCarpetiles.com webstore. I have a couple of samples on order from them and plan to give them a call tomorrow. They look like they might have what we want.
This is what we use: http://www.quickline.us/chain-grab.html
ReplyDeleteThey're pretty proud of them but it won't foul and we pull ours right ondeck through the bow roller.
Thanks, Bob. We've looked at that product quite extensively -- the Quickline guy comes to all the Trawler Fest shows.
DeleteThe fact that it would fit through the roller is the major benefit. That said, getting the rest of the snubber through the roller with it is next to impossible, due to the design of the roller.
I've also asked him several times if he ever intends to offer it in galvanized -- I am not a fan of stainless ground tackle. The answer has always been "no."
I am curious -- do you put it on from above the chain, so gravity holds it in place when you pay out, or do you bring it up from underneath and hold it under tension with some line? Quickline says the latter method is preferred, but that would complicate our roller problem even further.
I pull it up from under the link. Its remarkable how unwilling it is to fall off. We generally set the anchor and wait a while to make sure we're not moving before we hook up the snubbers. After that I often end up putting the snubbers on alone. If we're in a tight anchorage I'll pull in some chain and put the ultra hook on just below the bow roller with the snubbers attached to it. Otherwise I just put it on and let out more scope. Sometimes I'll get Marilyn to keep a little pressure on one line to keep the hook from falling off the chain while I let out scope but often I do it alone and its remarkable how it seems to hang in there by itself. Its a fairly snug fit between the links.
DeleteWhen we retrieve I just pull the chain in until the hook comes through the bow roller. About half the time it will trip and fall free when it hits the bow roller and the other half of the time it comes up through the roller onto the deck dragging the snubber lines behind it. I expect I've read the same things you have about SS ground tackle and I have chosen not to worry about it. YMMV.